


Send Message
Privacy statement: Your privacy is very important to Us. Our company promises not to disclose your personal information to any external company with out your explicit permission.

“Don’t Guess, Just Roll: Perfect Every Time” is all about making every roll more precise, consistent, and effortless. By eliminating uncertainty and simplifying the process, it helps users achieve reliable results with greater confidence. Whether you’re aiming for accuracy, efficiency, or repeatable performance, this approach takes the guesswork out of the experience so you can roll smoothly and get it right every time.

A suitcase can look great on a store shelf and still become difficult to handle at the airport. Small wheels catch on uneven floors, handles wobble, and an overloaded case may pull to one side. I have found that smooth travel starts with the right case, a sensible packing plan, and a quick check before leaving home.
The wheels carry most of the load, so I inspect them before looking at colors or extra pockets.
Spinner cases with four wheels move well through airports, hotel lobbies, and train stations. They can turn in place, which helps when space is limited. Two-wheel cases may handle rough pavements better because the wheels are often larger and set farther from the case body.
When I test a suitcase, I roll it across several surfaces:
The case should move without loud rattling or a strong pull to one side. I also check whether the wheels remain steady when the case is full. A wheel that feels loose while empty may become harder to control after packing.
A telescopic handle should extend without sticking. It should also feel stable when I guide the case beside me.
I pull the handle to its full length and gently move it from side to side. A little movement is normal, but too much looseness can make the suitcase feel awkward. I also test the handle at each height setting. This matters when I share the case with a family member or switch between walking and waiting in line.
The handle should fit my walking position. If I need to bend my wrist or lift my shoulder, the case may not be comfortable for longer distances.
A large suitcase gives me more space, yet extra room can lead to heavier packing. A smaller case may be easier to carry and store, but it requires more planning.
I choose the size based on:
For a short business trip, a compact case with space for a change of clothes, shoes, toiletries, and a laptop may be enough. For a longer holiday, I look for useful interior space rather than a large empty shell.
Airline size and weight rules can vary by route and ticket type. I check the current policy before packing instead of relying on an old measurement.
The way I pack changes how the suitcase rolls.
Heavy items should sit near the bottom and close to the wheels. Shoes, books, and toiletry bags can make the case unstable if they are placed near the top. Clothing can fill the open spaces around them.
I use packing cubes to separate shirts, underwear, and accessories. This reduces the need to search through the entire case. I also leave a small amount of space for items I may collect during the trip.
A simple weight check helps. If the suitcase feels difficult to lift from the floor, it may also be harder to guide through a crowded station.
A hard-shell case can help protect packed items from pressure. A fabric case may offer flexible storage and outside pockets. Neither choice removes the need for careful packing.
I place fragile items in the center, surrounded by soft clothing. Liquids go into sealed bags. Electronics stay where I can reach them easily if security staff ask me to remove them.
I avoid placing valuable items in checked baggage. Passports, medication, keys, cash, and essential electronics stay in my personal bag.
I do not wait until the airport to discover a problem.
Before a trip, I pack the case close to its expected weight and roll it around the home. I test doorways, turns, lifts, and stairs. If the suitcase pulls to one side, I move the heavier items closer to the center and test it again.
I also check:
A short inspection can prevent a long walk with a broken wheel.
On a three-day work trip, I once used a compact four-wheel case with a laptop bag. I placed shoes and a charger near the bottom, folded clothing into two packing cubes, and kept documents in the front compartment. The case stayed balanced while moving through a crowded station.
The main lesson was simple: the case did not need to be large. It needed to suit the trip and remain easy to control when packed.
I keep the heavier bag on my stronger side and avoid dragging it across stairs when lifting is safer. On escalators, I hold the handle and keep one hand free for balance. In busy areas, I pull the case close rather than letting it trail behind other people.
When the floor changes from tile to carpet, I slow down. A quick pull may work on smooth ground but feel unstable on a thicker surface.
Good travel gear does not replace good preparation. I choose a case that matches my route, test the wheels with a realistic load, and pack the weight close to the base. Those small habits make the suitcase easier to guide and reduce the chance of dealing with avoidable problems during the journey.

I used to think a good sushi roll depended on special skills. My rice spread unevenly, the filling slipped out, and the nori tore before I reached the last step.
The problem was not the recipe. It was the method.
A smooth roll starts with simple preparation and steady pressure. Here is the process I use at home.
Start with rice that is firm enough to hold its shape. Let it cool before placing it on the nori. Warm rice can soften the sheet too quickly and make the surface sticky.
Place the nori on a bamboo mat with the rough side facing up. Keep a small bowl of water nearby for your fingers. Wet hands help spread the rice without pulling the nori apart.
Cover about two-thirds of the nori with a thin layer of rice. Leave a clear strip at the top edge. That space helps seal the roll later. A thick layer may look generous, but it often makes the roll difficult to close.
Add the filling in a narrow line across the lower third of the rice. Cucumber, avocado, cooked shrimp, and imitation crab are easy choices for home preparation. Keep the amount moderate. Too much filling can create gaps and make the roll lose its shape.
Lift the edge of the mat closest to you. Use your fingers to keep the filling in place while you roll the nori over it. Press gently to form the first turn. This step sets the shape, so slow movement helps.
Continue rolling while keeping light, even pressure. Do not squeeze the mat tightly. I learned this after making a roll that looked neat outside but pushed all the filling out from the sides.
When the exposed nori reaches the outside, moisten the edge with a little water. Finish the roll and let it rest seam-side down for about one minute. This gives the nori time to hold its shape.
Use a sharp, damp knife to cut the roll. Wipe the blade between cuts when rice begins to stick. Six or eight pieces usually give a clean result, but the size can match your preference.
My most useful lesson came from a small dinner at home. I prepared two rolls with the same ingredients. The first had too much rice and filling, so it opened during cutting. The second used a thin rice layer and a smaller filling line. It stayed firm and produced even pieces.
A good roll does not need complicated tools or expensive ingredients. It needs balanced portions, a calm pace, and enough space to close properly. When the rice, filling, and pressure work together, the process becomes much easier to repeat.

Every roll carries more than material. It carries production time, storage space, labor, and part of the customer promise.
I have seen a roll look affordable on a purchase order and become expensive on the factory floor. A few meters may be lost during setup. More material may be wasted when the width does not match the machine. Poor storage can damage the surface before the roll reaches production.
Making every roll count starts with better decisions before the roll is opened.
I begin with the real production need.
A roll should match the job as closely as possible. Width, length, core size, material grade, surface finish, and winding direction all affect machine performance. A small mismatch can create extra trimming, repeated adjustments, or a longer setup period.
Before placing an order, I check:
This simple check helps me avoid buying material based only on price per roll. A lower unit price does not always mean a lower production cost.
I also look at how the roll will be used.
A roll that works well for one product may not suit another. For example, a packaging line producing small pouches may need a different material width from a line producing large bags. If I use a wide roll for a narrow product, the unused edge becomes waste. If I select a narrow roll, the team may need more joints or more roll changes.
The best choice is linked to the full job, not just the material label.
Machine setup is another area where waste can grow.
When a new roll is loaded, the operator may need to adjust tension, alignment, temperature, pressure, or speed. Rushing this stage can lead to wrinkles, uneven edges, poor sealing, or print defects. I prefer a short setup checklist that records the settings used for each material.
A useful checklist can include:
The test section may use some material, but it can prevent a much larger loss later. For a small converter producing printed labels, a few minutes of checking can help avoid hundreds of meters with poor registration or color variation.
Storage also affects roll performance.
I keep rolls away from direct sunlight, water, dust, and sharp changes in temperature. Heavy rolls need stable support. They should not be placed where forklifts or pallets can strike the edges. The wrapping should remain in place until the material is ready for use.
A clear storage label can show:
This makes stock easier to control. It also helps the team use older suitable material before opening a newer roll, while still respecting product specifications and customer requirements.
Waste records give me information that estimates cannot provide.
I record the material used, the finished output, the setup loss, rejected sections, roll changes, and the reason for each rejection. After several production runs, patterns become easier to see.
A factory may discover that most waste comes from one product size. Another may find that waste increases on a certain machine shift. A third may notice that damaged roll edges are linked to transport or storage. Each cause needs a different response.
One packaging supplier I worked with found that many rejects were not caused by the film itself. The main issue was uneven tension during startup. The team changed the setup check and adjusted the startup speed. Their waste level improved across later batches, though the exact result depended on the product and machine.
That is why I avoid promising the same saving for every operation. Production conditions are different. Good results come from measurement, testing, and regular adjustment.
People on the production floor should also have a voice.
Operators often notice problems before they appear in reports. They know which rolls are difficult to load, which batches need longer setup, and which storage areas create trouble. I ask for their feedback and connect it with production data.
A short weekly review can cover:
Make Every Roll Count is not about forcing every meter into production. Some material must be removed to protect quality and safety. The goal is to understand where loss happens, reduce avoidable waste, and use each roll with better planning.
When I match the roll to the job, prepare the machine, protect the material, and study the waste record, the roll becomes easier to manage. Production becomes more predictable, purchasing decisions become more practical, and the team has clearer information for the next order.
A roll may look like a simple unit on a warehouse shelf. Its value is created through every step after delivery.

Getting a good result once is encouraging. Getting the same result across every batch, project, or customer order takes a clear process.
I have seen teams spend hours fixing small errors that could have been avoided with a simple checklist. A missed measurement, unclear instruction, or rushed review can change the final outcome. When the process depends on memory alone, quality can shift from one day to the next.
Consistency starts before the work begins.
Step 1: Define the result
I begin by describing what a successful result should look like.
This may include:
Clear details give everyone the same reference point. A team cannot produce a consistent result if each person uses a different standard.
Step 2: Record the process
A written process reduces guesswork.
I keep the instructions practical and easy to follow. Each step explains what to do, what to check, and what action to take if something changes. Long explanations often get ignored during busy work, so short instructions are more useful.
For example:
This structure works for many tasks, from preparing food to packing customer orders or reviewing marketing designs.
Step 3: Use the same tools and measurements
Small differences in tools can create different results.
A bakery may use the same scale for every batch. A printing team may check color with the same reference sheet. A service team may use the same form when collecting customer details.
I do not rely on visual judgment alone when a measurement is available. A number, sample, or clear reference usually gives better control than memory.
Step 4: Check early, not only at the end
A final review can catch problems, but an early check can prevent wasted time.
I prefer to review the first part of the work before continuing with the full task. If the first sample meets the required standard, the rest can follow the same process. If it does not, the correction is smaller and easier to manage.
A small bakery producing 200 loaves might check the dough after the first batch. The team can adjust the water, temperature, or mixing time before preparing the remaining loaves. This simple check can reduce waste and keep the texture more consistent.
Step 5: Keep a record of changes
When the result changes, I look for a change in the process.
Was a different material used? Did the temperature shift? Was the task completed by a new team member? Did the customer request something outside the usual specification?
A short record helps connect the cause with the outcome. It also prevents the same issue from being repeated without a clear reason.
Step 6: Train people with examples
Instructions become easier to understand when people can see the expected result.
I use sample images, completed forms, product references, or short demonstrations when they fit the task. A new team member may understand a visual example faster than a page of written details.
Training should also include common mistakes. People need to know what an acceptable result looks like and what requires correction.
Step 7: Improve one part at a time
When a process has problems, changing everything at once makes the cause harder to find.
I adjust one part, test the result, and record what happens. This may feel slower at the start, but it creates better information. The team learns which change helped and which change had little effect.
A reliable process does not need to be complicated. It needs to be clear, measured, and easy to repeat.
There will still be factors outside your control. Materials may vary. Equipment may need service. Customer requirements may change. A strong process does not pretend these issues do not exist. It gives the team a clear way to respond.
The goal is not to promise a flawless result under every condition. The goal is to reduce avoidable errors, spot problems early, and make quality easier to repeat.
When I can define the standard, follow the steps, check the work, and learn from each result, consistency becomes part of the process rather than a matter of luck.
For any inquiries regarding the content of this article, please contact Hu: dgliheng168@163.com/WhatsApp +8613509684273.
International Air Transport Association (2024) Passenger Baggage and Travel Preparation Guidance
Harold McGee (2020) Keys to Better Rice Preparation and Food Texture
Wayne Gisslen (2022) Professional Cooking Techniques for Sushi and Rice-Based Foods
Joseph Juran (2019) Quality Planning and Process Consistency in Manufacturing
Theodore T Allen (2021) Production Waste Reduction and Process Improvement
International Organization for Standardization (2015) Quality Management Principles and Operational Control
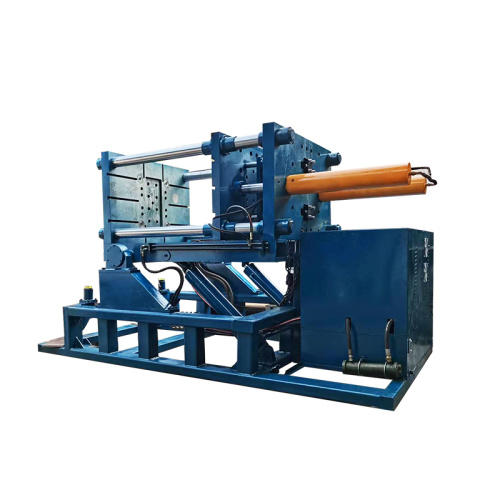
Switching to hydraulic rolling brings three clear advantages: greater precision, smoother and more consistent results, and higher efficiency for demanding applications. Its powerful hydraulic contr
Is your old press holding your business back? Frequent breakdowns, rising maintenance costs, slow production speeds, and inconsistent print quality can reduce efficiency and limit your ability to m
Top engineers choose Shengshiweiye presses because they combine dependable performance, precision engineering, and robust construction with advanced technology. Built for demanding production envir
Stop wasting valuable metal with our high-performance roll press, engineered to maximize material efficiency and minimize scrap. Its precise forming process delivers consistent results, helping man
Email to this supplier

October 16, 2026
October 15, 2026
Contact

Send Inquiry
PRODUCT CATEGORIES
Privacy statement: Your privacy is very important to Us. Our company promises not to disclose your personal information to any external company with out your explicit permission.
Fill in more information so that we can get in touch with you faster
Privacy statement: Your privacy is very important to Us. Our company promises not to disclose your personal information to any external company with out your explicit permission.