

Send Message
Privacy statement: Your privacy is very important to Us. Our company promises not to disclose your personal information to any external company with out your explicit permission.

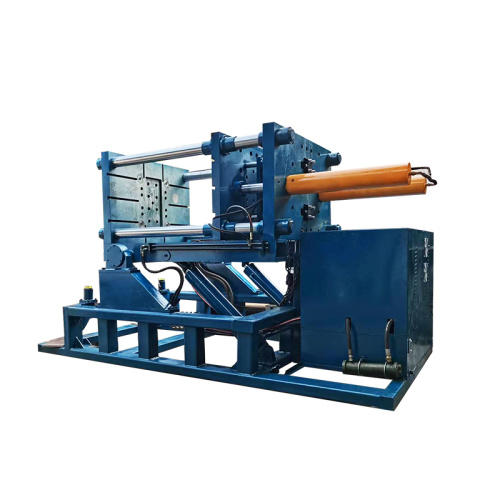
Stop wasting valuable metal with our high-performance roll press, engineered to maximize material efficiency and minimize scrap. Its precise forming process delivers consistent results, helping manufacturers reduce production costs, improve product quality, and make better use of every piece of raw material. Reliable, accurate, and built for demanding operations, our roll press is the smart solution for greater productivity and sustainable metal processing.


Metal waste raises material costs, slows production, and leaves less usable stock for future jobs. I see this problem often in workshops that cut steel, aluminum, copper, or stainless steel without a clear cutting plan.
The waste may come from small mistakes: a poor nesting layout, an incorrect kerf setting, a worn blade, or a remnant that is sent to the scrap bin too soon. Each piece looks small on its own. Across many orders, the loss becomes easy to measure.
I reduce cut metal waste by treating every sheet, bar, and tube as usable inventory.
I begin with a simple record:
A shop may believe it has a cutting problem when the real issue is poor material storage. Another shop may blame operators when the main loss comes from outdated drawings.
A short measurement period can show where the waste starts. The data does not need to be complex. A spreadsheet, job traveler, or production software can be enough for a small workshop.
The cutting layout has a direct effect on material use.
Before cutting, I check whether parts can be arranged closer together without affecting safety, edge quality, or production speed. For sheet metal, nesting software can test different layouts and compare material use. For bar and tube cutting, a cut list can help place parts in an order that uses the full length.
The layout needs to include:
A layout that looks efficient on screen may not work on the machine if the operator cannot clamp the stock safely. I prefer a plan that reduces waste while remaining easy to run.
Kerf is the material removed by the cutting tool. A saw blade, laser, plasma torch, or abrasive wheel creates a different cut width.
If the software uses an incorrect kerf value, the final parts may not match the drawing. The operator may need to cut replacement parts, and the original material becomes scrap.
I check kerf when:
A simple test cut can reveal whether the programmed value matches the actual cut. This small check helps prevent repeated dimensional errors.
Many workshops keep large pieces of leftover metal but cannot find them when a new order arrives. The material then gets purchased again, while the remnant stays unused.
I label each remnant with:
A basic rack map can help workers find usable stock. The system does not need to be expensive. The key is to make each remnant visible and easy to identify.
I also set a minimum remnant size. A very small piece may create more handling and inspection work than value. A larger piece can be stored for small brackets, test parts, repair work, or short production runs.
Buying standard stock is convenient, but it can create avoidable waste when the job requires short lengths or narrow blanks.
I compare:
For repeated orders, a different stock size may reduce the offcut on every batch. The best option depends on price, lead time, and the number of parts required. A lower purchase price does not always mean a lower total cost if the unused material is large.
Worn tools can create rough edges, excessive heat, inaccurate dimensions, and rejected parts.
I include checks for:
The operator should know which signs require a stop and inspection. A poor edge on one part may point to a tool problem that could affect the whole batch.
Maintenance also supports safer work. A machine that needs excessive force or repeated adjustment can increase both scrap and operator risk.
The cutting sequence affects waste, heat, part movement, and machine time.
For sheet work, I may cut smaller internal features before removing the outer profile. For bars and tubes, I check whether the order leaves a useful remnant rather than a short unusable piece.
The sequence should consider:
A good sequence is not always the one with the shortest travel distance. It should produce accurate parts and leave stock that can still be used.
Not every scrap piece comes from the same cause.
I divide waste into groups:
This makes corrective action easier. A layout issue needs a different response from a material defect. Replacing the cutting machine will not solve a drawing problem.
I record the reason at the time of rejection instead of asking workers to remember it later. Short notes such as “wrong hole position” or “remnant too short” provide useful patterns after several jobs.
A small fabrication shop produces support brackets from steel sheet. The team cuts each order separately and places leftover pieces in an unmarked corner. Workers often open a new sheet because they cannot confirm the grade or thickness of the old pieces.
The shop introduces three changes:
After several production cycles, the team can see which layouts create the most offcuts and which remnants are worth keeping. The shop does not need to replace its cutting machine. Better information helps the existing process use more of each sheet.
The result will vary by material, product design, and production volume. Measurement matters more than a promised percentage.
I place the waste check at three points:
This creates a simple feedback loop. The person preparing the job can see what happened on the previous run, while the operator can report problems before the next batch begins.
Small improvements often come from ordinary actions: updating a cut list, marking a remnant, checking the kerf, or changing the cut order. The goal is not to remove every offcut. Some cutting loss is part of the process. The goal is to know why it occurs and decide whether the material can be used again.
When I treat metal waste as process information rather than ordinary rubbish, the workshop gains better control over material, quality, and production planning.

Travel costs can rise through small choices: checked-bag fees, damaged luggage, extra taxi rides, and replacement wheels. I have found that a smoother trip often starts with one simple decision—choosing luggage that rolls well and using it with care.
“Roll smarter, save more” is not about buying the most expensive suitcase. It is about looking at the full cost of each trip and choosing tools that fit the way I travel.
Two-wheel luggage can work well on uneven sidewalks because its larger wheels often handle cracks and rough ground with less trouble. Four-wheel luggage may feel easier inside airports, train stations, and hotels, where I can push it beside me instead of pulling it behind me.
The right choice depends on the route.
I ask myself:
A suitcase with smooth, well-fitted wheels can reduce strain on my arm and may help prevent sudden stops. Wheel quality matters more than extra pockets that I rarely use.
A low purchase price does not always mean a low travel cost. I look at several details before making a decision:
A heavy suitcase can reduce the amount I can pack before reaching an airline’s weight limit. A bag that is slightly more expensive but lighter may suit frequent travelers better. A repairable wheel can also be more useful than a design that requires full replacement after one damaged part.
I do not pay for features I will not use. Built-in charging ports, complex compartments, and decorative parts may add cost without helping my usual trips.
Good packing can make a rolling bag easier to control.
I place heavier items near the bottom when the case is upright. Shoes, books, and toiletry bags stay close to the wheel side. Lighter clothing goes on top. This arrangement helps keep the center of weight lower, so the suitcase is less likely to tip when I pull it.
I also leave a small amount of space. An overfilled bag can put extra pressure on zippers, seams, and wheels. It may look efficient at home, yet become difficult to close or carry at the station.
A simple packing list helps me avoid bringing items that will remain unused. Fewer items can mean a lighter bag, easier movement, and lower risk of paying for extra baggage.
Wheels collect dust, sand, and small stones during a trip. I check them after walking through outdoor areas and remove visible debris with a dry cloth. If a wheel starts making an unusual sound or pulling to one side, I inspect it before the next trip.
I avoid dragging luggage down long flights of stairs. Lifting it for a short distance can prevent stress on the wheel housing. I also keep the bag away from standing water when possible, since moisture can affect metal parts and fabric panels.
A quick inspection takes little time:
These checks do not prevent every problem, but they can help me notice small issues before they become travel delays.
The best luggage cannot make a poor route convenient. I check the distance between parking areas, platforms, gates, and hotel entrances before leaving. A short walk may be cheaper than a taxi, but only when the route is suitable for my bag and physical comfort.
For example, a traveler arriving at a city train station may choose a hotel that is a ten-minute walk away instead of one that requires a short taxi ride. If the sidewalk is smooth and the luggage is light, the walk can reduce transport spending. If the route includes steep steps or damaged pavement, the taxi may be the more practical choice.
Saving money should not mean ignoring comfort or safety. I compare the route, weather, luggage weight, and time available.
A damaged handle or wheel does not always mean the whole suitcase needs to be discarded. I check the manufacturer’s repair policy and ask local luggage repair shops for an estimate. Replacement parts may be available for common models.
When repair costs are close to the price of a new bag, I compare both options carefully. A new case may offer better support, while a repair may reduce waste and keep a familiar bag in use. My choice depends on the condition of the frame, fabric, zippers, and handle—not only one damaged wheel.
Smart rolling is a habit built from practical choices. I select luggage for my routes, pack by weight, maintain the moving parts, and review the total travel cost instead of focusing only on the shelf price. These steps can make trips easier to manage and may help me spend less without buying features I do not need.

When I print marketing materials, I want two things: clean results and less wasted paper. Poor settings, unclear files, and rushed checks can lead to reprints, extra packaging, and more cost. A better process starts before the paper reaches the printer.
I begin with the file.
The document should have the right page size, margins, image quality, and color mode. A flyer prepared for A4 paper should not be sent as a letter-size file and adjusted at the last step. That small mismatch can change the layout, cut off text, or leave large empty areas.
I also check the images at their final size. A large image file does not always produce a better print. A small, blurry image can make the finished piece look weak, even when the rest of the design is clean.
A short file check can prevent many avoidable reprints:
A test print helps me see what the screen cannot show. Colors may look brighter on a monitor than they do on paper. Small text may seem easy to read on screen but feel too small in the hand. A single proof sheet gives me a chance to adjust the file before producing a larger batch.
Paper choice also affects waste.
A thick paper may suit a business card, while a simple notice may work well on a lighter stock. Choosing paper based on how the item will be used can reduce unnecessary material without making the product feel cheap.
For example, I once worked on a small café menu. The owner planned to print a heavy, full-color menu for every table. After reviewing how often the menus were replaced, we selected a lighter paper with a protective finish. The menus stayed easy to handle, and the café used fewer materials for each replacement batch.
Layout gives me another way to reduce waste.
I check whether several small items can fit on one sheet. Business cards, product labels, and event tickets often leave unused space when the layout is not planned. A print-ready sheet can use that space more effectively, while cut lines and safe margins still remain clear.
This process works well:
Batch size deserves careful attention. Printing more copies may lower the unit cost, but extra stock can become waste when contact details, prices, or product information change. I prefer to estimate the expected use and add a small buffer instead of producing a large amount without a clear need.
Digital printing can be useful for short runs and changing content. Offset printing may suit larger, stable quantities. The right choice depends on the number of copies, paper type, color needs, and how often the file will change.
I also keep a record of past print jobs. The record can include:
This simple habit helps me avoid repeating the same mistake. If a certain paper caused smudging or a file needed extra trimming, I can check the notes before preparing the next order.
Waste does not come only from paper. Extra packaging, unused samples, and incorrect shipping details can create more material use. I ask for suitable packing for the order size and reuse clean sample sheets for internal checks when possible.
A useful print process is not about printing less at any cost. It is about printing with a clear purpose. A well-checked file, a suitable paper choice, a measured quantity, and a simple proof can protect both the result and the materials used to produce it.
Press better, waste less starts with a few careful decisions before the print button is selected.

Metal efficiency affects more than material cost. It shapes production speed, waste levels, product quality, and the workload placed on each operator.
When I visit a metal fabrication shop, I often see the same problems: cutting plans leave large unused sections, machines run with incorrect settings, scrap is mixed together, and rework hides the true cost of production. Each issue may look small. Together, they reduce the value gained from every sheet, bar, tube, or coil.
I use a practical approach to improve metal efficiency without adding unnecessary complexity.
I begin by checking how much metal enters the workshop and how much becomes a finished product.
A simple record can include:
This information gives me a usable baseline. A shop that records only purchase weight may miss waste created during cutting, forming, welding, and quality checks.
For example, a small workshop may purchase 10,000 kilograms of mild steel each month. If 7,800 kilograms become finished parts, 1,200 kilograms remain as reusable offcuts, and 1,000 kilograms become scrap, the material picture is easier to understand. The business can then focus on the largest source of loss instead of guessing.
Cutting layout has a direct effect on material use.
I review part dimensions, order quantities, grain or rolling direction, kerf width, and the shape of the remaining offcuts. A good nesting plan places parts close together while leaving enough space for safe cutting and later processing.
Useful actions include:
A leftover piece may appear too small for one job but fit another order. Marking its grade, thickness, length, and width gives operators a clear way to find it.
I prefer a material library that uses simple labels. A tag such as “304 stainless steel, 3 mm, 600 × 900 mm” is easier to use than an unclear storage code.
Material efficiency often begins before a part reaches the cutting table.
During design reviews, I ask:
A part that looks efficient on screen may create extra setup work or leave poor offcuts on the shop floor. A small change in hole position can sometimes allow two parts to share one cutting area.
Design changes must still protect strength, safety, fit, and customer requirements. Material reduction should never rely on removing metal that the product needs.
Incorrect machine settings can create waste even when the layout is good.
Cutting speed, power, feed rate, tool condition, bend allowance, and clamping position all affect the result. I recommend keeping approved settings for common materials and reviewing them when operators report burrs, distortion, rough edges, or inaccurate bends.
Operators can use a short check before production:
This check takes less time than sorting a full batch of incorrect parts. It also helps separate material problems from machine problems.
Rework consumes metal, labor, energy, and machine time. It can also create delays when a replacement part needs to be cut from fresh stock.
I track the reason for each rejected part instead of recording every defect as “operator error.” Common causes include:
The record should show where the defect happened and how it was found. If a defect appears after welding, the cutting process may not be the source. If the same hole is missed on several batches, the drawing or program may need review.
A short inspection after cutting can prevent larger losses during assembly. Critical dimensions deserve attention before the part moves to the next stage.
Offcuts become waste when workers cannot identify or access them.
I recommend separating materials by:
A basic storage rack with visible labels can work for many small and medium workshops. Digital tracking becomes more useful when the number of offcuts grows or several teams share the same stock.
Offcuts that are bent, contaminated, rusty, or too small for safe handling should not be forced into production. Reuse only when the material still meets the job requirement.
Poor handling can damage metal before production begins.
Sheets stored on uneven supports may bend. Stainless steel can suffer surface contamination when it is kept with carbon steel tools or debris. Long bars may become difficult to use when they are placed where forklifts or carts can strike them.
I check whether:
Good storage reduces damage and makes stock easier to count. It also lowers the chance of opening a new sheet when a suitable piece is already available.
Worn tools often produce more scrap than expected.
A dull saw blade can create rough cuts and extra trimming. A worn punch may deform holes. A dirty laser lens can affect cut quality. A misaligned press brake can cause repeated angle errors.
I set maintenance checks around actual machine use rather than waiting for a major failure. The schedule can include:
Operators should have a simple way to report changes in sound, vibration, finish, or accuracy. These signs may appear before the machine causes a large batch of defects.
Metal efficiency is not measured only by scrap weight.
I also review:
A shop may reduce scrap weight but increase labor time through slow cutting plans. Another shop may improve material yield while creating more defects. The useful measure connects material use with quality and production results.
A fabrication shop producing equipment frames noticed that its monthly steel scrap was rising. The team reviewed order records, cutting programs, and offcut storage.
The review showed three causes:
The shop grouped common parts into shared cutting plans, created a labeled rack for offcuts, and added a blade inspection to the weekly maintenance list. The team then measured material use for the next production cycle.
This type of change does not depend on a single machine or expensive system. It depends on accurate records, shared rules, and regular review. The actual result will vary by material, product shape, machine type, and production volume, so each workshop should measure its own baseline.
I do not treat metal efficiency as a one-time project. Production changes, customer orders change, and material prices change. A cutting plan that worked well last month may not suit the next batch.
A short weekly review can ask:
Small, measured changes are easier for operators to accept and easier for managers to judge. They also show whether a new process saves material without creating another problem.
Better metal efficiency comes from choices made across the whole workflow: design, purchasing, storage, cutting, forming, welding, inspection, and recycling. When each stage records useful information and shares it with the next stage, the workshop gains better control over every piece of metal it buys.

A spreadsheet can hold a month of sales, a stock list, a project plan, or years of customer records. Yet a file with too many tabs, unclear labels, and mixed data can slow down the whole team.
I have seen people spend more time searching for the right sheet than using the information inside it. The problem is not always the software. Often, the sheet lacks a simple structure.
A useful spreadsheet should help me answer three questions:
Each sheet should support one main task.
A sales workbook may include:
That structure makes sense because each tab has a defined role. Problems appear when one sheet contains sales figures, staff notes, delivery dates, and personal reminders at the same time.
I use a short purpose statement at the top of a workbook:
“This file tracks weekly product orders and delivery status.”
That sentence helps me decide what belongs in the file and what should stay somewhere else.
A tab called “Sheet1” tells me nothing. A tab called “March Orders” gives me useful information before I open it.
I prefer names that include the subject and time period:
A consistent naming style helps when several people work on the same file. It also reduces the chance of editing the wrong tab.
Avoid long names that become hard to read. Use words your team already understands.
Good data usually follows a simple pattern:
For an order sheet, useful columns may include:
| Order ID | Order Date | Customer | Product | Quantity | Status |
|---|---|---|---|---|---|
| A1042 | 2025-03-04 | Green Lane Café | Coffee Beans | 12 | Shipped |
This layout makes filtering, sorting, and reporting easier. It also helps when the data is later connected to another tool.
A common mistake is placing several details in one cell:
Green Lane Café - 12 bags - shipped
That may look quick, but it limits what I can do with the data. Separate columns give each detail a clear place.
Formatting should help people read the sheet. It should not distract them.
I normally use:
Color can show status, but it should not be the only signal. A status column with words such as “Pending,” “Packed,” and “Shipped” remains useful when the file is printed or viewed without color.
Too many colors create noise. If every cell has a different shade, the important information becomes harder to find.
People need to know which cells they can edit.
I use one area for entered data and another area for formulas or summaries. Input cells can have a light background, while formula cells remain protected or use a different style.
For example:
This arrangement helps reduce accidental changes to formulas. It also makes training easier for new users.
A formula can return a number and still be wrong.
I check:
A small test can expose many errors. If a sheet calculates the total for 100 orders, I may manually check five rows and compare the result with the formula output.
I also keep a sample row that is easy to verify. This creates a quick reference when the sheet changes later.
Dropdown lists reduce spelling differences.
A status field may use:
Without a dropdown, one person may enter “Shipped,” another may enter “Sent,” and another may type “ship.” A report may treat these as three separate values.
The same method works for:
Data validation is a small setup step that can save hours of cleaning.
When several people edit a workbook, the data needs a basic history.
I often add columns such as:
For larger workbooks, a separate change log can record what changed and why.
This matters when a sales figure moves, an order status changes, or a customer record is corrected. A short note can prevent long discussions later.
A report should guide attention toward useful information.
A sales summary might show:
The figures should link back to the source data. If someone asks, “Why did this number change?” I should be able to trace the answer without checking every tab.
Charts can help when they show a real pattern. A line chart may suit weekly sales. A bar chart may suit product comparisons. A chart with too many categories usually adds work without adding understanding.
A small café supplier may track orders in a single workbook. At the start, the file contains one tab with customer names, product details, delivery notes, payment updates, and staff comments.
As the order count grows, the team faces several issues:
A cleaner setup could use:
The team does not need a complex system to improve the file. It needs consistent fields, clear ownership, and a review habit.
A spreadsheet can become outdated even when the layout looks tidy.
I review each file for:
I also ask a person who did not create the workbook to open it. If that person can understand the main purpose without a long explanation, the structure is doing its job.
A useful spreadsheet is not judged by how many tabs it contains. Its value comes from helping people find accurate information and act on it without confusion.
When every sheet has a purpose, every column has a clear meaning, and every formula can be checked, the workbook becomes easier to trust. That is how I make every sheet count.

Metal costs affect more than the purchase order. Extra trim, failed cuts, poor nesting, and unused offcuts can raise production costs without adding value to the finished part.
I have seen teams focus on material price while overlooking the way metal moves through the workshop. A small change in design or cutting practice can reduce waste, improve sheet use, and make material tracking easier.
A metal-saving upgrade starts with a clear view of current waste.
Record the material used for each job. Compare the original sheet size with the weight or area of the finished parts. Keep notes on:
This information helps separate normal production loss from avoidable waste. It also gives me a practical reference before I choose new software, tooling, or design changes.
Material nesting is one area that deserves close attention. When parts are placed manually, small gaps can appear around edges and between shapes. A nesting program may use the sheet more efficiently by changing part direction, grouping similar shapes, and keeping reusable offcuts visible.
The result depends on the part design, machine limits, grain direction, and order size. A layout that works for one job may not suit another. I treat the software result as a production plan that still needs review from the operator.
Design changes can support metal savings as well. A bracket with several small bends may require more cutting space than a simpler shape. A mounting hole placed too close to an edge can lead to rejected parts. A small adjustment to hole spacing, bend position, or part dimensions may help reduce scrap while keeping the required function.
These changes should be checked by the design and production teams. A lower material cost does not help if the part becomes difficult to form, install, or maintain.
Tooling also affects material use. Worn blades, poorly set punches, and unstable fixtures can create rough edges or inaccurate cuts. The damaged part may need to be scrapped, even when the sheet layout was efficient.
I check tool condition as part of the material-saving plan. Operators can record when defects appear and connect them with a machine, tool, or batch. This makes the review more useful than simply counting the amount of scrap at the end of the month.
Consider a sheet metal shop producing equipment panels. The team may start with a 1,000 mm by 2,000 mm sheet and cut several panels from it. If the layout leaves an 80 mm strip along one side, that strip may be stored without a clear use. A revised layout could fit a smaller support part into the space, provided the part meets strength and forming requirements.
This example does not promise the same result for every workshop. The actual saving depends on part shape, order volume, machine capacity, and material type. A short production trial can show whether the change is suitable before it becomes part of regular work.
A useful upgrade plan can follow this path:
Material tracking should remain simple. A shared spreadsheet, job card, or production system can record sheet size, batch number, planned parts, actual parts, and leftover material. The aim is to help people make better decisions, not add paperwork that no one uses.
I also recommend giving reusable offcuts a clear label. The label can show material grade, thickness, dimensions, and storage date. Without this information, workers may avoid using the piece because its quality or size is uncertain.
A metal-saving upgrade works best when it fits the way the workshop already operates. The right choice may be improved nesting, better stock control, a revised part design, machine maintenance, or a combination of small process changes.
The practical lesson is simple: measure the waste, find its source, test one change, and keep the results visible. When material use becomes part of everyday production planning, savings can be reviewed with facts rather than assumptions.
We welcome your inquiries: dgliheng168@163.com/WhatsApp +8613509684273.
Michael R. Hayes 2021 Material Efficiency Strategies for Modern Metal Fabrication
Laura Bennett 2020 Practical Methods for Reducing Cutting Waste in Manufacturing
Daniel Cooper 2022 Sustainable Sheet Metal Design and Production Planning
Emily Carter 2019 Print Management Techniques for Lower Paper Consumption
James Wilson 2023 Spreadsheet Organization for Reliable Business Data
Sophia Turner 2021 Smart Travel Equipment Selection and Luggage Maintenance
The Roll Round Hydraulic Press is designed for high-precision forming and stable, repeatable performance, with accuracy of up to 98% achievable under optimized operating conditions. Its durable con
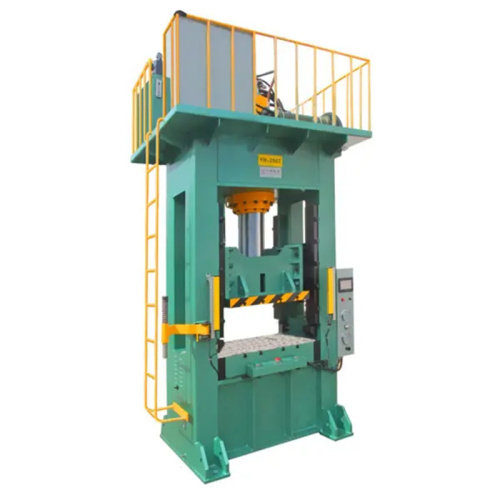
Meet 40T, a fast, precise, and reliable solution built to perform when it matters most. Designed for consistent operation and dependable results, 40T combines speed, accuracy, and stability to help
Upgrade Your Shop with 40T Power and experience dependable performance built for demanding work. Designed to deliver impressive strength, consistent results, and reliable operation, 40T technology
The 40T Hydraulic Press is built for demanding industrial pressing applications, delivering powerful force, dependable operation, and precise control. Its robust construction supports consistent pe
Email to this supplier

October 12, 2026

September 22, 2026
Contact

Send Inquiry
PRODUCT CATEGORIES
Privacy statement: Your privacy is very important to Us. Our company promises not to disclose your personal information to any external company with out your explicit permission.
Fill in more information so that we can get in touch with you faster
Privacy statement: Your privacy is very important to Us. Our company promises not to disclose your personal information to any external company with out your explicit permission.