

Send Message
Privacy statement: Your privacy is very important to Us. Our company promises not to disclose your personal information to any external company with out your explicit permission.

Tired of inefficient cutting machines that slow production, increase material waste, and deliver inconsistent results? Upgrade to a faster, more precise, and reliable cutting solution built to streamline operations and enhance overall productivity. With improved accuracy, dependable performance, and reduced operating costs, the right machine helps manufacturers save time, maximize materials, and maintain consistent quality on every job. Make the switch to smarter cutting technology and give your business the efficiency it needs to stay competitive.


A cutting machine can affect every part of a production day. When it moves slowly, misses the cut line, wastes material, or needs frequent repairs, the issue reaches far beyond the machine itself. Orders take longer, staff spend more time checking results, and customers may wait for updates.
I have found that a machine upgrade works best when it solves a clear production problem. A larger model is not always the right choice. The better option depends on the materials, file types, order volume, cutting width, and level of operator control needed.
I begin by tracking the tasks that consume the most time.
Ask yourself:
A simple production record can show where the pressure comes from. Write down the machine model, material type, job size, setup time, cutting time, waste, and rework. After two or three weeks, you may see a pattern.
A sign shop that produces vinyl graphics may lose time during weeding and registration. A packaging supplier may need stronger cutting force for board stock. A textile business may care more about smooth edges and stable feeding. Each situation calls for a different machine choice.
The machine should fit the materials you use most often.
For vinyl, film, paper, and thin sheets, check:
For cardboard, foam board, rubber, leather, or thicker sheet materials, check:
A machine designed for light film may not perform well with dense board. A model built for heavy materials may add cost and space that a small graphics shop does not need.
I prefer to test the machine with my own files and materials. Product samples from a supplier can look good, but they may not show how the machine handles small letters, tight corners, long runs, or repeated shapes.
Cutting quality depends on more than hardware. The workflow between design software and the cutting machine matters just as much.
Check whether the system can:
A smooth file transfer can remove many manual steps. When operators do not need to rebuild paths or adjust settings for every job, production becomes easier to manage.
I have seen a small graphics team reduce setup problems by creating saved presets for common vinyl types. The presets included blade depth, speed, pressure, and pass count. The team still checked each material, but operators no longer started every job from memory.
A higher speed rating may sound useful, but speed alone does not show how a machine will perform.
A fast cut that creates rough corners can lead to extra handling. A slower cut with clean edges may reduce rework. The useful figure is the time needed to complete a finished, accepted piece.
When comparing machines, test:
Watch how the machine starts, changes direction, and finishes each path. Listen for unusual vibration. Check whether the material shifts during the run.
For a packaging company, a clean fold line and accurate cut may matter more than the highest movement speed. For a sign shop producing large quantities of simple labels, feed stability and job automation may have a greater effect on daily output.
The purchase price is only one part of the budget.
I calculate the expected cost by reviewing:
A machine with a lower purchase price may require more manual adjustment or more frequent part replacement. A higher-priced model may fit the workflow better, but the difference should be supported by clear production needs.
Use your own numbers. If a machine saves 30 minutes on five jobs each week, calculate the value of that saved time based on your labor cost and production schedule. Do not assume that every saved minute becomes extra profit. Some time may be used for packing, quality checks, or customer service.
A new machine can create delays when the team does not receive enough training.
A practical training plan can cover:
I like to create a short operating guide beside the machine. It can include the settings for common materials, signs of a worn blade, steps for clearing a jam, and the name of the person who handles service questions.
Clear instructions help reduce guesswork. They can also make handovers easier when different operators use the same equipment.
Measure the available space before delivery. Leave room for material loading, operator movement, ventilation, and routine cleaning.
Review the full workflow:
A cutting machine may perform well while still causing a bottleneck if the surrounding process is not ready. For example, a wider cutter may handle larger sheets but require a new storage rack and a longer path for material movement.
Regular care supports stable results.
A basic schedule may include:
Keep a record of maintenance and recurring errors. If the same issue appears after similar jobs, the cause may be a worn tool, unsuitable settings, material movement, or file preparation.
Do not wait for poor output to become the only sign of a problem. Small changes in sound, cutting depth, edge quality, or tracking can guide an early check.
Give the team a clear review period after installation. Track the same figures used before the change:
Compare similar jobs rather than looking at one busy day. Material type, order size, and staff experience can affect the results.
My view is simple: a successful upgrade should make daily work easier to control. It should reduce avoidable steps, support the materials you actually use, and provide settings that operators can understand.
The right cutting machine is not always the largest or fastest model. It is the one that fits your workflow, gives consistent results, and supports the next stage of your business without creating new problems.

Many businesses lose time in places that seem too small to measure: repeated machine setup, unclear file names, manual checks, material waste, and jobs that wait between steps.
I have seen this pattern in print shops, packaging teams, sign workshops, and small manufacturers. The cutting itself may take only a few minutes. The delay often comes before and after the blade starts moving.
A faster workflow does not always require a faster machine. It often starts with better preparation.
I begin by checking five parts of the process:
This simple review helps me find where time is being lost.
A clear file system can remove many avoidable delays. I use names that show the customer, job number, material, size, and revision. A file such as OakStreet_1042_Acrylic_600x400_R2 gives the operator useful information at a glance. It reduces the chance of opening an old version or cutting the wrong size.
I also keep a short pre-cut checklist:
The checklist does not need to be long. It needs to cover the mistakes that cause rework.
Batching can help when several orders use the same material or tool setting. For example, a small sign shop may receive ten jobs that use 3 mm acrylic. Cutting these jobs in a planned group can reduce repeated setup work. The team still keeps each order separated with labels and job sheets.
Batching should not turn into a large pile of unfinished work. I set a practical limit based on storage space, delivery dates, and inspection capacity. A large batch can create new problems when one setting affects many pieces.
Material layout also deserves attention. I place commonly used sizes into standard templates and leave enough space for the cutting path. A layout that saves material but makes pieces hard to remove may slow the whole process. I look at both material use and handling time.
One packaging team I worked with had frequent delays after cutting. The pieces were accurate, but operators spent too long sorting them. We changed the layout so each group stayed together after cutting, added simple job labels, and used separate trays for each order. The cutting time stayed almost the same. The handoff became easier, and fewer pieces were mixed between jobs.
Machine settings should be recorded in a way the team can understand. I keep a basic log with:
These records are starting points, not permanent promises. Material batches can vary, and different machines may need different settings. A small test cut before a full job can prevent wasted stock.
Maintenance also affects output. Dust, worn blades, loose parts, and poor alignment can lead to rough edges or repeated cuts. I prefer a routine based on actual use. Operators can complete quick daily checks, while deeper maintenance can follow a weekly or monthly schedule that fits the machine and supplier guidance.
I measure a few useful numbers:
These figures show whether a process change is helping. A shorter cutting time means little if rework increases. A lower material cost may not help if sorting and packing become slower.
Technology can support the workflow, but it should solve a known problem. A digital job board may help when orders are often missed. Automatic nesting may help when material waste is high. Barcode labels may help when many small jobs move through the same workspace. I choose tools after identifying the delay, not before.
I also make responsibilities clear. One person checks the file. Another may prepare the material. The operator follows the approved job sheet. A final check confirms size, quantity, and surface condition. Small teams can share these roles, but the handoff should still be visible.
My approach is simple: remove repeated decisions, prepare common jobs in advance, record useful settings, and measure the result. Cutting faster matters, yet the larger gain often comes from fewer interruptions and fewer corrections.
When each step has a clear place, the team can take on more work without turning every order into a rush. Growth becomes easier to manage because it comes from a repeatable process rather than longer hours.

Slow cutting creates more than delays. It can leave operators waiting, raise material use, and make each job harder to control. I have seen a small change in the cutting process affect the whole workshop: more offcuts, more rework, and less time for orders that need attention.
A better result usually comes from several practical details working together.
I start with the material plan
Before cutting, I check the material size, part dimensions, grain direction, and required finish. A clear layout helps reduce unused areas and lowers the chance of cutting the wrong piece.
For sheet materials, I place larger parts first and fit smaller parts into the remaining spaces when the design allows it. I also leave enough room for the tool path. Saving material does not mean placing every line as close as possible. A cut that is too tight may cause edge damage or make removal difficult.
I use the right cutting settings
Cutting speed, feed rate, blade condition, and material type all affect the result. A setting that works well for thin plastic may not suit thicker wood, foam, metal, or composite board.
When the cut edge becomes rough, I do not change every setting at once. I check one point at a time:
This approach makes the cause easier to find. It also reduces the risk of turning a small issue into a damaged batch.
I keep the material stable
Movement during cutting can lead to uneven edges, incorrect dimensions, and extra waste. Clamps, vacuum tables, support blocks, or other suitable holding methods can help keep the material in place.
The holding method should not press on an area that needs to be cut. It should also avoid leaving marks on surfaces that will be visible in the finished product. I check the support points before the job starts, especially when working with thin or flexible sheets.
I prepare the file before sending it to the machine
Many cutting problems begin in the design file. Open lines, overlapping paths, duplicate shapes, and incorrect scales may cause repeated cuts or incomplete parts.
I review the file with a simple checklist:
A short file check can prevent hours of machine time from being spent on the wrong output.
I choose a cutting order that matches the job
The cutting order affects stability and accuracy. Small internal features often need to be cut before the outer shape. If the outside is removed too early, the remaining material may shift.
For a sign project, I may cut holes and inner letters before cutting the outside edge. For a panel with many small parts, I may use a path that keeps the sheet supported for as long as possible.
There is no single order for every material. The best choice depends on thickness, stiffness, shape, and the way the parts will be handled after cutting.
I reduce setup time between jobs
Repeated setup can make a busy workshop feel slow, even when the machine itself is working at a steady pace. I group jobs with similar materials, thicknesses, and tools where the production plan allows it.
I also keep common tools, clamps, cleaning supplies, and measuring equipment in known locations. A clear work area helps operators spend less time looking for equipment and more time checking the actual job.
I inspect the first piece
The first cut gives me useful information before the full batch begins. I measure key dimensions, check the edge, confirm the shape, and compare the result with the drawing.
If the first piece is not correct, I adjust the process before more material is used. This small inspection step is especially useful for custom orders, unfamiliar materials, and jobs with tight measurements.
A workshop example shows why this matters. Imagine a cabinet shop cutting panels for a small kitchen project. The operator loads the sheet, starts the program, and checks the first panel after cutting. One measurement is slightly outside the drawing. By stopping at that point, the shop can correct the file or machine setting before cutting the remaining panels. The saved material is only part of the benefit. The team also avoids fitting problems during assembly.
I track waste by cause
Offcuts do not all come from the same source. Some come from the shape of the design. Some come from poor nesting. Others result from incorrect settings, damaged edges, wrong measurements, or failed first pieces.
I record the reason beside the job number. After several projects, a pattern often appears. If most waste comes from file errors, the design check needs attention. If edge damage appears often, the tool or cutting setting may need review.
This gives me a clearer way to improve the process. Guessing can lead to random changes. A simple record shows where time and material are being lost.
I maintain the machine on a regular schedule
Dust, chips, worn blades, loose parts, and blocked extraction can affect cutting quality. I clean the working area, inspect the tool, check moving parts, and follow the machine maker’s maintenance guidance.
Maintenance does not need to be complicated. A short check before production and a deeper inspection at planned intervals can help identify problems before they affect a full order. Safety guards and emergency controls should also remain accessible and functional.
The goal is not to push the machine beyond its rated limits. It is to create a stable process where the operator, material, file, tool, and machine work together.
When I review a slow or wasteful cutting job, I look at the whole workflow rather than blaming one setting. A better file, a stable workpiece, a suitable tool, a clear cutting order, and a first-piece check can make the process easier to manage.
The result may be less waste, fewer corrections, and more predictable production. Each workshop has different materials and equipment, so I test changes on a small job, record the result, and keep the methods that fit the actual work.

A clean cut starts with steady cutting power.
When power drops or changes during a cut, the result can be uneven edges, extra material waste, and more time spent on grinding or reworking. I have seen this issue in metal shops, woodworking areas, and maintenance rooms where the tool was suitable for the job, yet the cutting process still felt slow and hard to control.
Reliable cutting power helps the blade or disc keep a more stable pace through the material. That gives me better control, a smoother finish, and fewer interruptions during daily work.
A cutting tool needs enough power to handle the material without forcing the operator to push too hard. When the motor keeps its output more steadily, I can guide the tool at a controlled speed instead of stopping to adjust pressure.
This matters when working with:
The right level of power depends on the material, thickness, blade type, and cutting method. A tool with steady output can support the process, but it still needs to be matched with the correct accessory and working speed.
A rough edge often comes from several small problems. The blade may be worn, the material may not be fixed firmly, or the operator may be using uneven pressure. Power that changes during the cut can make these problems harder to manage.
I prefer a setup that lets me keep both hands in a natural position and guide the tool along the marked line. When the cutting action stays consistent, the edge is easier to inspect. Some materials may still need sanding, deburring, or light finishing, but the amount of extra work can be easier to manage.
For example, when cutting a metal tube for a frame, a steady cut can reduce the need for repeated grinding before welding. The final result still depends on measurement, blade selection, and operator skill, yet stable power gives the process a more dependable starting point.
I use a simple check before beginning any cutting task.
Check the material type and thickness before selecting the tool. A blade designed for wood may not suit metal, and a general-purpose accessory may not provide the finish needed for a precise job.
A dull, cracked, bent, or damaged accessory can affect the cut and create safety risks. Replace it when the teeth, edge, or surface no longer looks suitable for the task.
Movement during cutting can lead to an uneven line. Clamps, a stable workbench, or another suitable support can help keep the material in place.
A clear mark gives me a reference point throughout the cut. For repeated work, a guide or simple cutting jig can help improve consistency.
Excessive pressure can slow the motor and place more strain on the tool. I apply steady pressure and allow the blade to move through the material at a controlled pace.
After the cut, I inspect the edge for burrs, heat marks, cracks, or uneven sections. This quick check helps me adjust the blade, speed, or support method before starting the next piece.
Reliable cutting power is useful for more than one clean cut. It can support a smoother workflow when the same task needs to be repeated across several pieces.
In a small fabrication area, an operator may cut many sections of tube to the same length. If the tool slows during each cut, the operator may need to pause, change pressure, or spend more time correcting the edge. A steadier cutting action can make the process easier to repeat, while careful measuring keeps each piece within the required size.
The same approach applies to home repairs. Cutting a shelf panel, pipe, or trim piece does not always require the highest power. It requires a tool that suits the material and responds in a predictable way.
Cutting performance does not depend on motor power alone. The accessory, workpiece support, cutting angle, feed rate, and maintenance routine all affect the result.
I look for a balance:
This balance helps me avoid two common mistakes. Using too little power can make the tool struggle. Using more power than the job needs may reduce control and create unnecessary wear.
A reliable cutting setup gives me a steadier process from the marked line to the finished edge. With the right tool, suitable accessory, and controlled technique, I can reduce avoidable rework and produce results that are easier to check and repeat.

Every cut affects the next step of production. A small deviation can create uneven edges, extra waste, rework, and delays across the shop floor. When orders include different materials, shapes, and batch sizes, manual adjustments can make each job harder to control.
Smarter cutting technology gives me a clearer way to manage that work. It combines digital files, machine settings, material checks, and operator input in one workflow. The goal is simple: make each cut match the job while keeping the process easy to review.
I start with a clean digital design.
The cutting file should show the correct dimensions, cut lines, tool paths, and material thickness. A clear file helps reduce mistakes before the material reaches the machine. I also check whether the design includes narrow gaps, sharp corners, or small parts that may need a different cutting speed.
This step matters for many applications, such as:
A smart cutting system can read digital instructions and apply the selected settings with less manual input. The operator still reviews the job, but the machine can help keep repeated cuts more consistent.
Material choice also affects the result.
Paper, foam, fabric, plastic, and wood each respond to cutting pressure and speed in different ways. A setting that works well for a thin sheet may not suit a dense board. I prefer systems that allow operators to create and store material profiles. These profiles can include blade type, cutting pressure, speed, and tool height.
Before a full run, I recommend checking one sample piece. This simple step can show whether the edge is clean, the shape is correct, and the material stays in place. It also gives the operator a chance to adjust the file or machine settings before more material is used.
Nesting can help manage sheet layouts.
When several shapes fit on one sheet, nesting software can arrange them with less unused space. The result depends on the shape, spacing rules, grain direction, and safety margins. A machine should not place parts too close together when the material needs room for clean cutting.
For example, a small packaging workshop may receive an order for several box inserts in three sizes. Manual placement can leave irregular gaps between parts. A digital nesting tool can arrange the pieces based on their dimensions and spacing rules. The operator can review the layout, adjust the grain direction if needed, and send the file to the cutter.
This workflow does not remove the need for skill. It gives the operator better information before the cut begins.
A reliable cutting process usually follows a clear sequence:
Data from each job can support better decisions later. If a certain material often needs lower pressure, the operator can update the profile. If a design creates waste because of its shape, the layout can be reviewed before the next order.
I also look at maintenance as part of cutting quality. A worn blade, blocked vacuum area, loose fixture, or dirty sensor can affect the result. Regular checks help identify these issues before they cause a larger batch problem.
Smarter technology works best when the machine, software, material, and operator support one another. A digital file cannot correct a damaged sheet. A capable cutter cannot replace a proper sample check. Good results come from a process that keeps each part visible and easy to verify.
When I choose a cutting system, I look at more than cutting speed. I review file compatibility, material support, setup controls, safety features, service access, and operator training. These details shape daily production more than a single machine specification.
Make every cut count by building a process that can be checked, adjusted, and repeated. With the right digital workflow and careful material handling, cutting becomes easier to manage across prototypes, custom orders, and regular production.
For any inquiries regarding the content of this article, please contact Hu: dgliheng168@163.com/WhatsApp +8613509684273.
References
Michael R Thompson — March 12, 2021 — Improving Cutting Machine Efficiency in Modern Production
Laura J Bennett — July 8, 2022 — Material Selection and Process Control for Precision Cutting
David R Collins — November 19, 2020 — Practical Maintenance Strategies for Industrial Cutting Equipment
Susan K Walker — February 6, 2023 — Digital Workflows and Automation in Cutting Operations
Robert A Mitchell — September 25, 2021 — Reducing Material Waste Through Smarter Cutting Layouts
Emily P Carter — May 14, 2024 — Quality Control and Operator Training for Reliable Cutting Results
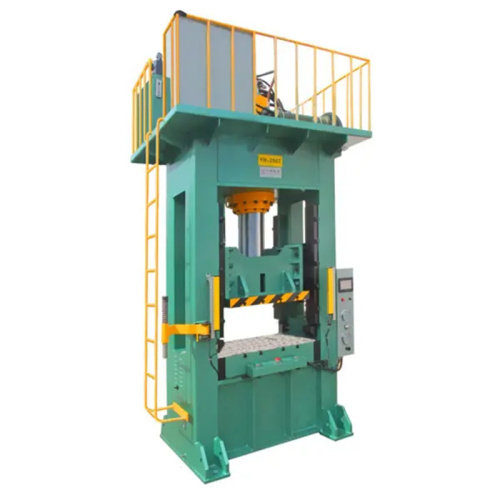
The 40T Hydraulic Press is engineered to deliver dependable power and precision for demanding industrial applications. With a 40-ton pressing capacity, it handles pressing, bending, forming, straig
The secret to faster edge cutting lies in combining the right tools with optimized techniques and precise control. Selecting efficient equipment, reducing friction, and maintaining a smooth workflo
Save valuable time every day with the powerful 40T Press, engineered for reliable performance and efficient operation. Its robust design helps streamline pressing tasks, reduce downtime, and improv
Experts favor 40T cutting technology because it combines precision, smooth operation, and dependable performance. Its optimized tooth density produces cleaner cuts while minimizing vibration, mater
Email to this supplier

September 13, 2026

September 12, 2026
Contact

Send Inquiry
PRODUCT CATEGORIES
Privacy statement: Your privacy is very important to Us. Our company promises not to disclose your personal information to any external company with out your explicit permission.
Fill in more information so that we can get in touch with you faster
Privacy statement: Your privacy is very important to Us. Our company promises not to disclose your personal information to any external company with out your explicit permission.